

Sunday, July 19, 2026
Beautiful You Thank You
Easter Shaker Cards
 |
| Storybook Friends Shaker Cards |

Friday, October 24, 2025
Elk Masculine Card

I love the simplicity of the elk image from the Outdoor Adventure bundle. I spritzed water after inking to give a watercolor look.

- Cut cardbase to 4 1/4 x 5 1/2
- Score at 4 1/4 and 2 1/8
- Cut decorative paper at 4 x 5 1/4 and two pieces at 1 7/8 x 5 1/4
I used soft suede and sahara sand inks on the elk and then spritzed before stamping. Also spritzed the trees after inking as well.
Thursday, September 4, 2025
Llama Birthday

The llama is the star of the show on this card. Such a fun and simple focal point. The LONG TIME NO SEE set is just adorable, and the dog in the set shines just as much! The card seemed like it was missing something so I added the hand-drawn black line border.

Sunday, December 29, 2024
Flip Flop Toadstools
I love this TERRIFIC TOADSTOOLS photopolymer set from the January - April 2025 Mini Catalog. And the matching TOADSTOOL GARDEN DSP that you can earn with sale-a-bration is fantastic! Such fun colors.
The Flip Flop Fun Fold is the star of the show. It needs little else to make it pop!


TRACY HENRY
3BOYMOMSTAMPS.BLOGPSOT.COM
https://Tracyhenry1.stampinup.net
Link to youtube video: https://youtube.com/shorts/bKlZBWVm-_I?feature=share
FLIP FLOP FUN FOLD OR DIAGONAL FUN FOLD
·
Polished
pink CS 8 ½” x 11”, scored at 4 ¼”. Cut front flap on the diagonal
·
Polished
pink CS 3” x 8” scored at 4” for smaller card adhered to back panel
·
Patterned
toadstool DSP paper 3 7/8” x 5 1/8” for background panel
·
Patterned
toadstool DSP 3 7/8” x 5 1/8” cut at diagonal for outside and inside triangle
flap
·
White
CS 2 ¾” x 3 ¾” – two pieces for front and inside of polished pink CS small card
PRODUCTS USED:
· TERRIFIC TOADSTOOLS photopolymer
stamp set
· UNBOUNDED LOVE photopolymer stamp set
· INKS Stampin Up: Pretty in Pink, Pear
Pizzazz, Flirty Flamingo, Strawberry Slush, Basic Gray
· BLACK INK: VersaFine Clair NOCTURN
· CARDSTOCK: SU Polished Pink, SU sale
a bration 2025 TOADSTOOL GARDENS 6x6, White Hammermill 80 lb
Thursday, September 12, 2024
Christmas Moose Card


I fell in love with these sweet critters in the Christmas Friends stamp set! This set is in the Sept - Dec 2024 mini catalog. They just exude so much joy! I used an old Snowflake EF (not sure of the name) and embossed a 4" x 5 1/4" piece of smooth white CS. Then on the reverse side (not the raised impression side, but the depressed side of the flakes) I brayered Night of Navy and Pacific Point. I fussy cut the moose image and colored with alcohol in markers. The sentiment is from an old Merry Moose stamp set. I cut bumps and swerves on white CS pieces to make the snow and used blending brushes to add a little blue to the top of the snow.
* I saw this brayered snow sky on a Ranger post somewhere, but didn't keep the link.
3 Step StampingTurtle Card

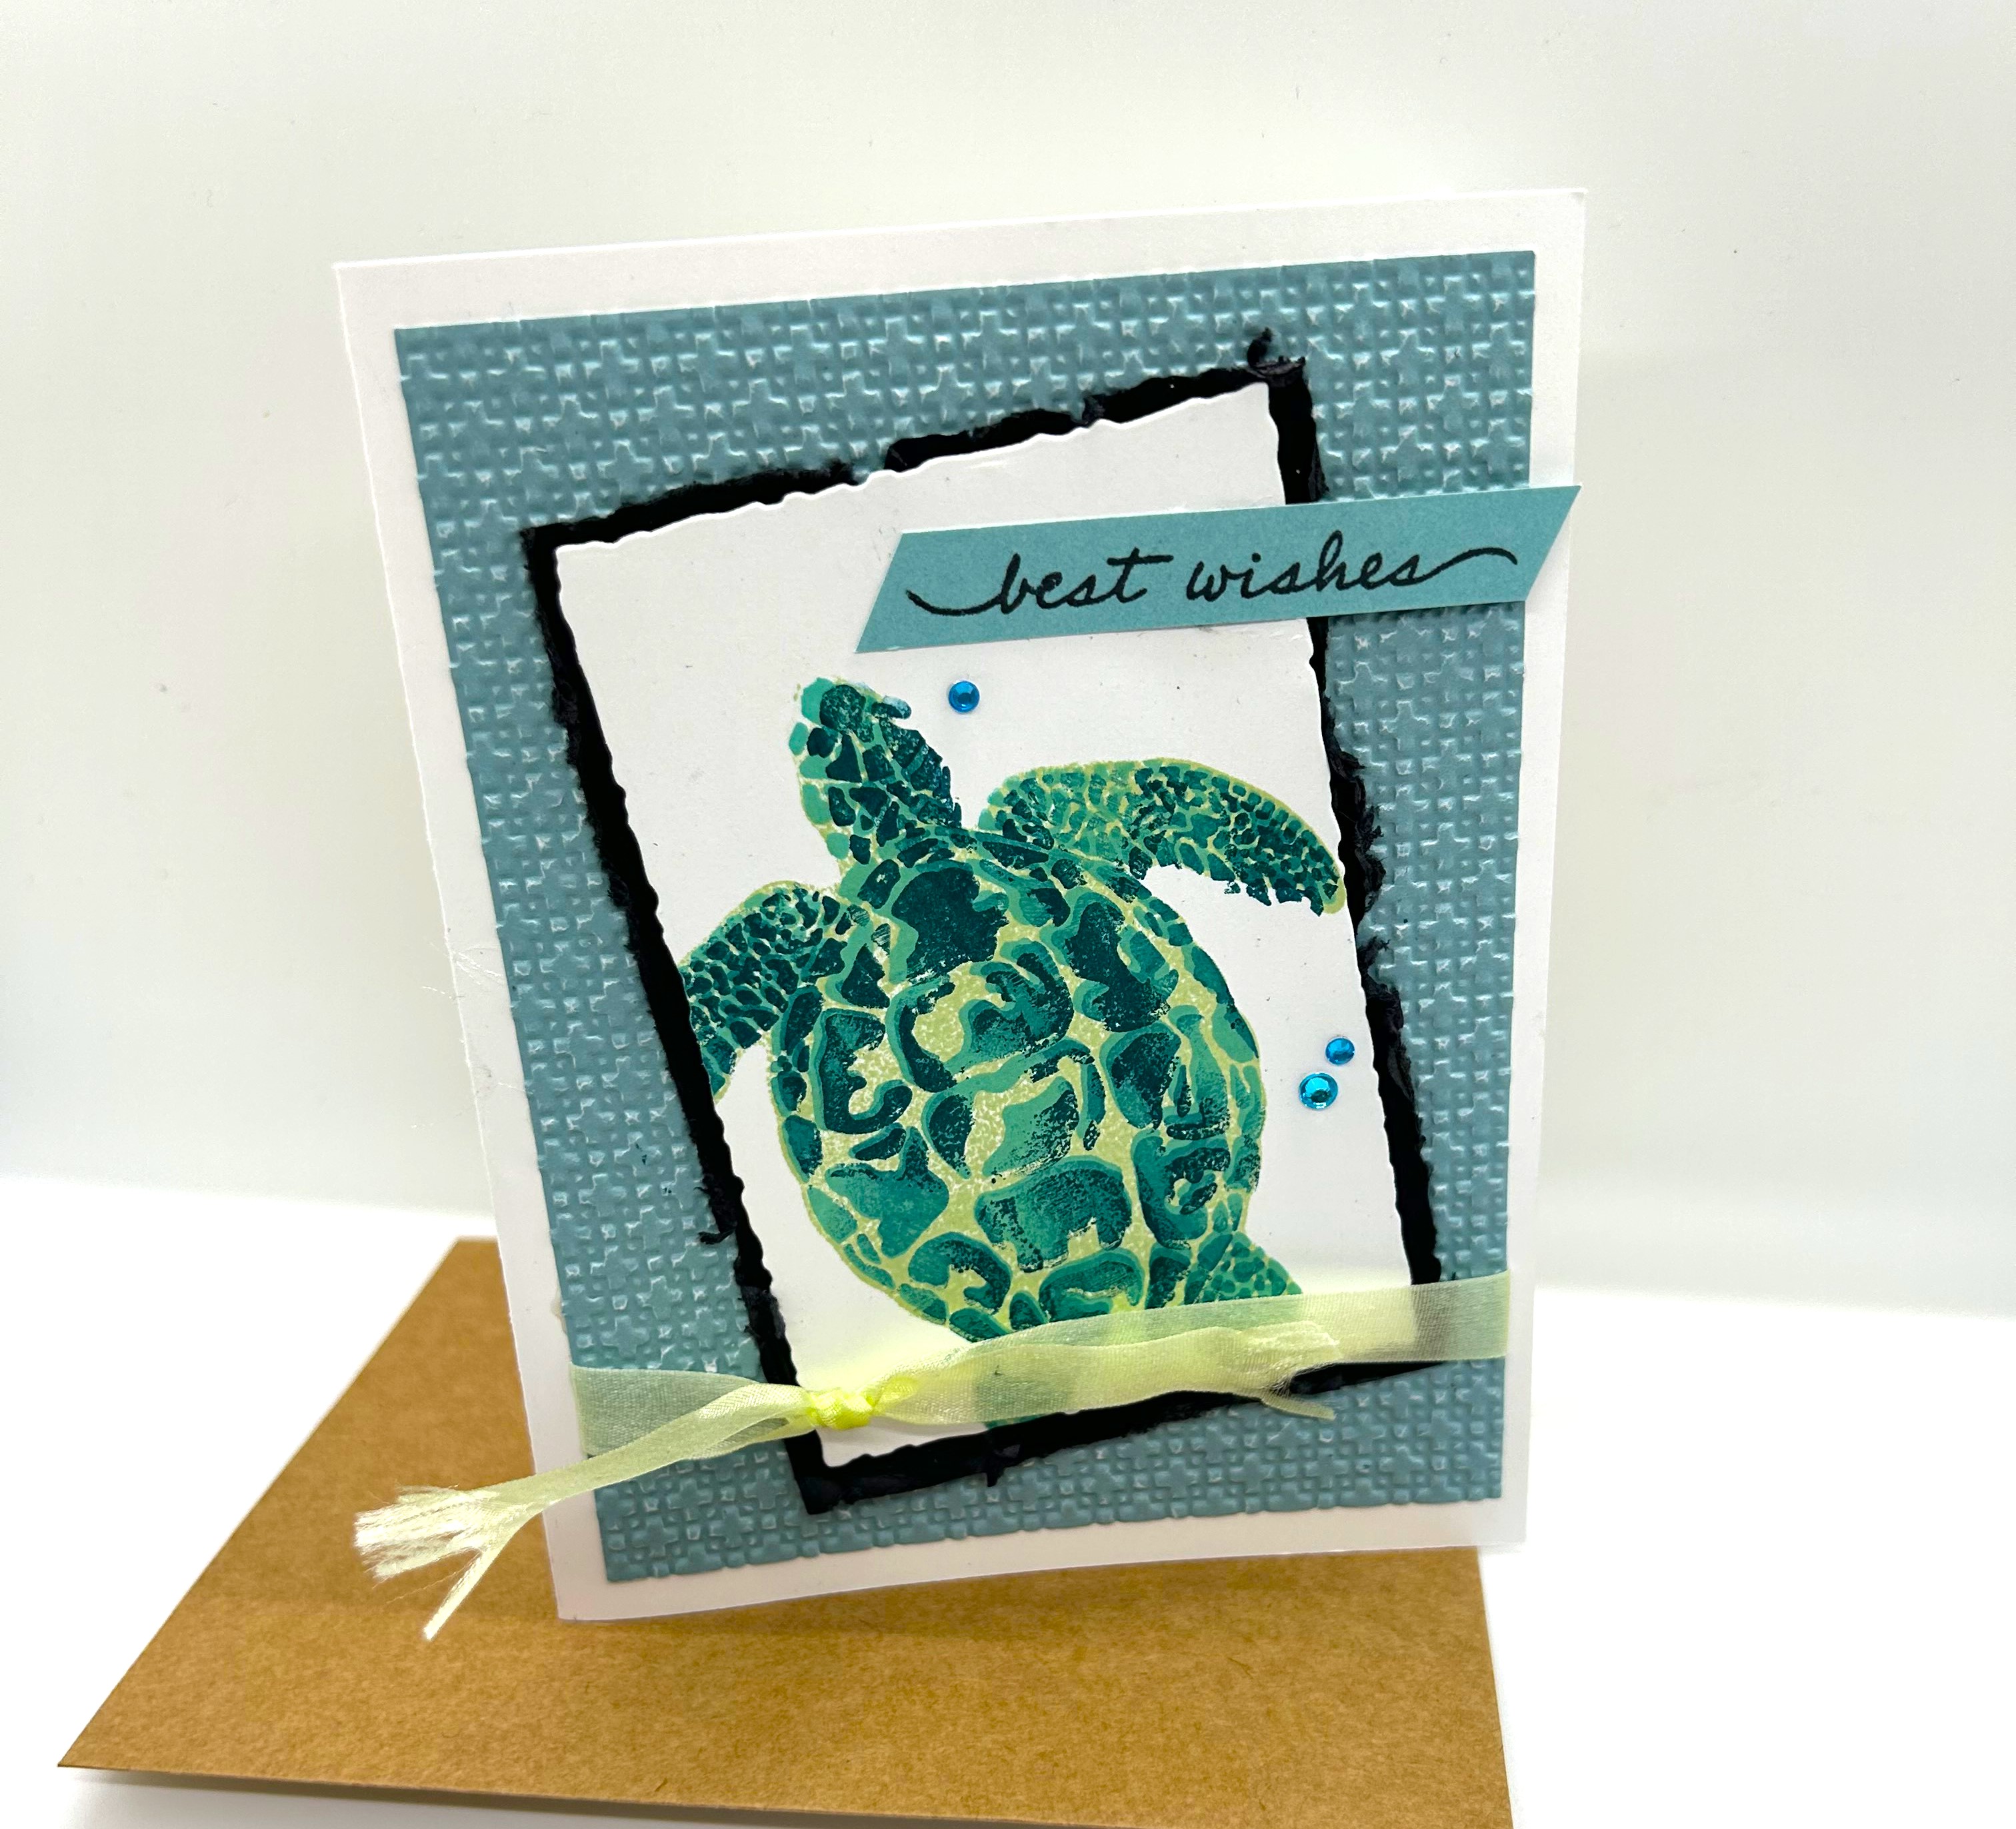
Let the stamps do the work for you on this simple turtle card! The Sea Turtle stamp set makes a beautiful impression. For the turtle, I stamped the smooth side of the stamp in Sea Foam Green, then flipped the stamp over to the image side and dabbed Summer Splash in a few place and stamped over Sea Foam Green image. Then inked again with Pretty Peacock in a few places on the stamp and stamped over the entire image again. It gives such depth and dimension. Sentiment is from Happiness Abounds stamp set.
Fun Center Flip Card


We made these at my last card class workshop.

Center Flip Card instructions:
- Card base White CS at 4 1/4" x 5 1/2". Patterned paper two strips approximately 1.5" x 5 1/2".
- Center Flip White CS 11" x 2 15/16".
- Embossed piece for front of center flip White CS 2 1/2" x 5 1/2" embossed with folder of choice
- Miscellaneous die cuts to apply to front of center flip.
To make the card adhere the two strips of patterned paper to outside edges of 4 1/4" x 5 1/2" piece of white CS. Fold the 11" x 2 15/16" piece in half at the 5 1/2" mark and this will become the center flip. Adhere the backside of the center flip to the card base, the edges overlapping the patterned paper slightly. Then add embossed 2 1/2" x 5 1/2" piece to font of center flip and any other die cuts and sentiments. I used images and die cuts from Forever Fern bundle for the foliage, and the Stitched Nested Labels dies. Sentiments are from Unbounded Love stamp set.
Friday, August 2, 2024
Poppies 2

Jungle Pals Case

Thursday, July 25, 2024
Embossed Birthday

Star Quilt Card

We made this star quilt card at my last card workshop. It's a fun quilt technique, and a great way to use up paper scraps!

- Card base: 8 1/2 x 5 1/2
- Background panel: 4 x 5 1/4 embossed with dotted circles
- Square background mat: 3 1/4 x 3 1/4
- Square base for quilt pattern: 3 x 3
- Quilt strips: 3/4 x 6 (four) pieces of patterned paper
- Quilt corners: 3/4 x 3/4 (four) white squares
- Center background banner: 1 3/4 x 6
For the assembly of the star quilt, layer two pieces of pattern paper diagonal to corners, letting ends overlap your white square. Now only glue the ends on one corner because you will need to weave your paper through on the next set. Layer two strips opposite corners and weave through strips already placed down. Once you have all strips lined up corner to corner and weaved through, you can glue all ends down. Turn piece over and cut off overhanging ends. Then glue the 3/4 x 3/4 white squares in each corner to create the star. You may add circles or gems to the center piece.
The Have a blessed day sentiment is from Unbounded Love stamp set.
Tuesday, July 16, 2024
Perennial Floral

I am really enjoying the boldness that this Dotted Circles 3D embossing Folder adds to a card. The sentiment is from the Perennial Postage stamp set and the flowers are from the Painted Lavender Bundle.
Knitting Llama

We made this card for one of my workshops. For some reason this llama from Zany Zoo set just makes me smile, so she was the perfect focal point on this simple card. I have a customer that is not a fan of ribbon, hence the paper strip in a folded pattern behind the llama. I'm also a big fan of the exposed brick 3d embossing folder.
Thursday, July 11, 2024
Watercolor Citrus Blooms

A super simple watercolor card using the citrus blooms stamp. I love the sentiment "JUST CHECKING IN". After stamping the image on watercolor paper, I used an aqua painter to color the image.
Friday, May 3, 2024
Zany Zoo CAS
 |
Wednesday, March 6, 2024
Classic Trucks card
I don't know about you, but I often struggle with ideas for a masculine card. I love this classic truck from the Trucking Along set item # 162299. It is available for purchase in the online exclusives. I also love that the truck comes with a coordinating punch - super simple to create multiple.

The truck is a two-step stamping, so the background color is from a stamp. The "best wishes" makes it a nice all occasion card. Simple, fun, masculine - ya!
Quilt Card Template
Hello. I came across a posting for this fun quilt card and I thought I would share the process with you. It is such a great way to use up paper scraps!
What you need:
- 8 1/2' x 5 1/2' for card base
- 4" x 5 1/4" background panel piece (in my case I used gray)
- (2) 1" x 5 1/2" strips of patterned paper
- (11) 1" x 4" strips of patterned paper
You could get away with less than the 11 pieces because you will only be using only a small corner or an inch or so on some of the pieces.
Place your background panel down and begin by adhering the two longest diagonal pieces - okay to let the edges overhang the panel. From there, use the template below to see placement of the remaining pieces. Just get the placement right with a small revealed border around each piece that you adhere. Don't worry about the overhanging edges - once all are attached, you will trim the edges down to the size of the background panel. Easy peasy!


This cute sentiment came from the Perennial Postage set item # 162598 in the mini catalog. To shop now:
https://www.stampinup.com/?demoid=2264627
Friday, January 26, 2024
Perennial Postage

Saturday, January 6, 2024
Earn free stuff Sale-a-bration!
Now is the time to earn free stuff! The new mini catalog is available, and sale-a-bration has begun. From now until February 28, 2024 earn free products when you spend $50.00 or $100.00.


Shop now:
https://TracyHenry1.stampinup.net
Subscribe to:
Posts (Atom)