 |
| Number of Years stamp set Playing around with a little vellum and the Number of Years stamp set and matching Large Number Framelits dies. I stamped the Chevron background stamp in Dapper Denim on one card, and Merry Merlot on the other. Stamped the "look who's turning" with the vine and numbers on vellum in Versamark Ink. Heat embossed in white and gold stampin'emboss powder.  Pretty simple overall, and I love the result. The white embossing stands out much more than it appears in the photo. |

Thursday, December 24, 2020
Look Who's Turning
That Was Awesome

It seems like an odd time of year to pull out an old set, especially flamingos! The snow is flying outside, but I had an itch to make a tropical card lol! I haven't used this Fabulous Flamingo set in a while, and it is so fun and versatile.
I coordinated it with the Stitched Nested Label dies and popped it out with pop up dots. The fronds were stamped in Cucumber Crush and the water in Lost Lagoon, followed by an aqua painter with some Lost Lagoon over the water. The grasses were stamped using Pear Pizzazz. The flamingo combo of inks: Flirty Flamingo for the main body, Smoky Slate for the outline accents, and Petal Pink for the light body color.
If you are interested in ordering any amazing Stampin' Up! products, please visit my store: https://www.stampinup.com?demoid=2211547
 |
| Flirty Flamingo set |
Sunday, November 15, 2020
Snowflake Sparkle


Playing around with So Many Snowflakes Dies and Snowflake Wishes stamp set. I used WINTER SNOW ef on the background, and then sponge brayered it with Mint Macaron. Also sponge brayered the Mint Macaron on Whisper White and then die cut snowflakes. For the front of the card I die cut the window, then embossed with WINTER SNOW ef and followed by sponging the edges in Mint Macaron. the sentiment May your season sparkle is embossed with Silver EP. I painted the fantastix frost white on the card and snowflakes with a wet paintbrush.
Tuesday, November 10, 2020
SCS challenge FF20luvtostampstampstamp

I'm always a fan of white, blue and silver, and it is snowing outside right now, so this card seems even more fitting! This is part of the fall fest 2020 challenge for SCS.
Mostly Stampin' Up! products, with the exception of the silver glitter paper.
SUPPLIES:
- WINTER SNOW EF
- PINE WOODS DIES
- WONDERLAND (sentiment)
- SILVER EP
- STITCHED SHAPES FRAMELITS
- RHINESTONES
- WINK OF STELLA
Created for the SCS FF20luvtostampstampstamp challenge. The challenge was for anything similar to this site: https://www.familyholiday.net/unleash-your-imagination-fairytale-winter-wonderland-decorations-ideas/
Sunday, November 8, 2020
Silent Night Brayer

Brayered background: started with Whisper White cs and brayered Dapper Denim from right top corner. Added another layer from top corner of Bermuda Bay and Bashful Blue. Then from bottom left corner brayered first Mint Macaroon, and then Lemon Lime Twist. Die cut white trees and snow hills are from Pine Woods Dies and the tree stamped in Cucumber Crush is from Mountain Air and cut with Majestic Mountain dies. Silent night was embossed in gold and is from Wonderland stamp set. Card base is Balmy Blue.
Thursday, November 5, 2020
CAS Black Glitter Moose

Another CAS card using the moose punch and the Christmas Greetings thinlits dies. The background cs behind the moose and merry dies is black glitter paper. Added the scarf from the Merry Moose stamp set. The ef is softly falling and I embossed after die cutting.
Wednesday, November 4, 2020
SC826 Moose Watercolor

Created for SCS challenge SC826. This is my first time submitting to a challenge thread on splitcoast stampers. For the card I used the sentiment from In The Pines stampin up stamp set and the die from matching Pine Forest dies. Moose is from Merry Moose stampin up stamp set and is punched out with coordinating moose punch.
Friday, October 30, 2020


Thursday, October 29, 2020

Wednesday, October 28, 2020

Wednesday, October 21, 2020

Tuesday, October 13, 2020
GATHER TOGETHER and COLORFUL SEASONS sets. Perfect for the fall season.

I used the leaf, pumpkin and wheat images from the GATHER TOGETHER set. The pumpkin and leaf were stamped in Delightful Dijon and cut with matching GATHERED LEAVES dies. The wheat was stamped in Soft Suede. Also stamped the leaf image from COLORFUL SEASONS in versamark and used Gold Stampin' Up! emboss powder, then cut leaf in white from coodinating SEASONAL LAYERS dies and adhered on top. The oval was cut using STITCHED SHAPES framelits.

The thankful sentiment was die cut on foil paper using a die from RECOLLECTIONS sentiment dies. The netting image was from a retired SU set TIMELESS TEXTURES.

Purchase the GATHER TOGETHER bundle 153036

Thursday, September 17, 2020
Bird Crazy and Gelli Plates
More Gelli plate fun and the bird crazy stamps from Tim Holtz Stamper's Anonymous. I love, love, love these funny little birds. Their facial expressions are darling.

I used the Gelli plate, lightweight watercolor paper, acrylics, distress inks, stencils, brayer, sponges, distress paste and washi tape to create the backgrounds. I love the funky bold colors, great patterns and textures, and of course the crazy birds! The sentiments are from Tim Holtz Stamper's Anonymous Tiny Text set.

SHINE LIKE THE STARS / light the way

BE YOUR BEAUTIFUL SELF / use your wings

DON'T FORGET TO FLY / choose to shine

the world needs who you were made to be / JUST ONE LIFE
Wednesday, August 12, 2020
Praying Gelli Plate Circles
Praying Gelli Plate Circles

I made three sympathy/praying for you cards last week. For all three cards I used the sentiment from SU set Flourishing Phrases. I love this sentiment because when one is going through a difficult time, or time of loss, it is so powerful to know that people are thinking of them and praying! For this one I used a gelli plate and stencil to create the background. I smooshed the distress oxide inks in picked raspberry, ripe persimmon, worn lipstick directly onto the gelli plate and then used a brayer to roll over them. I then placed the circle stencil on the gelli plate and sponged the hickory smoke distress oxide ink over the stencil, removed the stencil, and then pressed the paper down on the gelli plate. (I removed two images from the gelli plate, this may have been the second removal) For the flower from Stampers Anonymous Flower Garden, I diecut the flower, then used distress crayons to color the flower, and followed with stamping the image on top.
Sympathy Gelli Plate
Sympathy Gelli Plate

I made three sympathy/praying for you cards last week. For all three cards I used the sentiment from SU set Flourishing Phrases. I love this sentiment because when one is going through a difficult time, or time of loss, it is so powerful to know that people are thinking of them and praying! For this one I used a gelli plate and stencil to create the background. I placed the stencil on the gelli plate and sponged the distress oxide ink over the stencil, removed the stencil, and then pressed the paper down on the gelli plate. For the flower from Stampers Anonymous Flower Garden, I diecut the flower, then used distress crayons to color the flower, and followed with stamping the image on top.
Praying Distress Oxides

I made three sympathy/praying for you cards last week. For all three cards I used the sentiment from SU set Flourishing Phrases. I love this sentiment because when one is going through a difficult time, or time of loss, it is so powerful to know that people are thinking of them and praying! For this one I used the distress oxide inks on watercolor paper, spritzing with water to bring out the effect. For the flower from Stampers Anonymous, I first used distress crayons to color the flower and then stamped the flower image on top.
Sunday, August 2, 2020
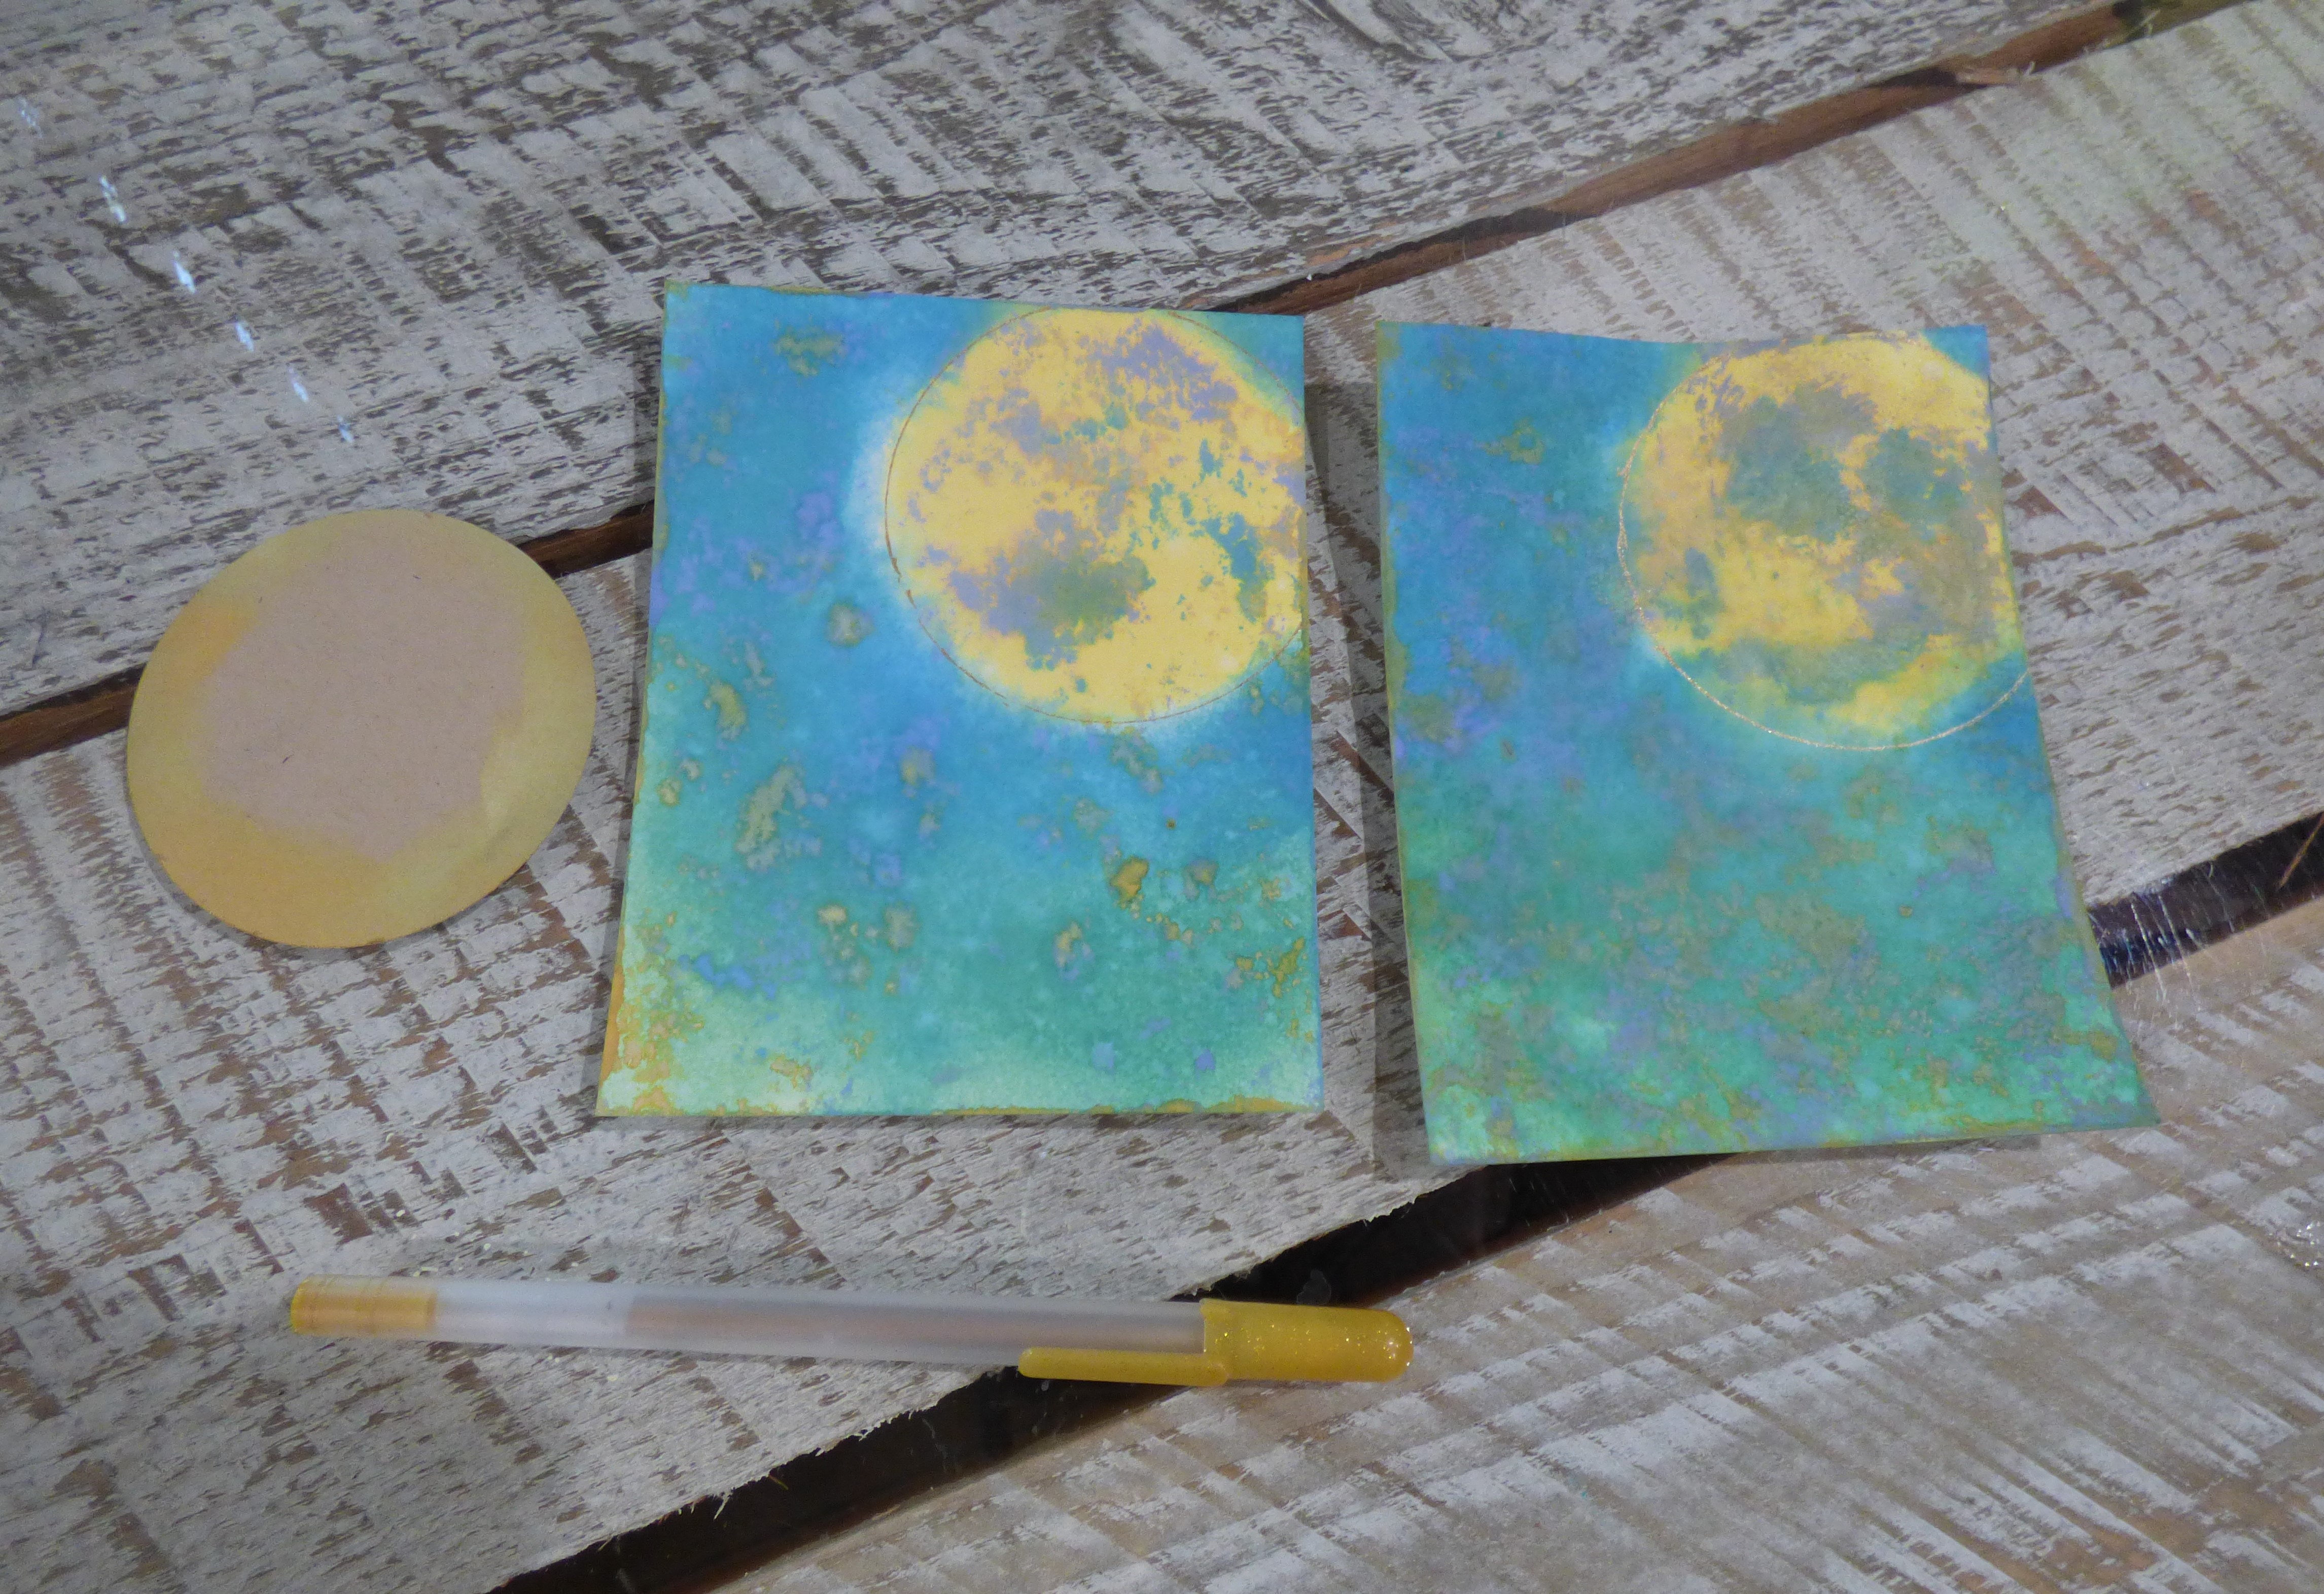
Rabbit jumps over the moon
 |
| Rabbit jumps over the moon |
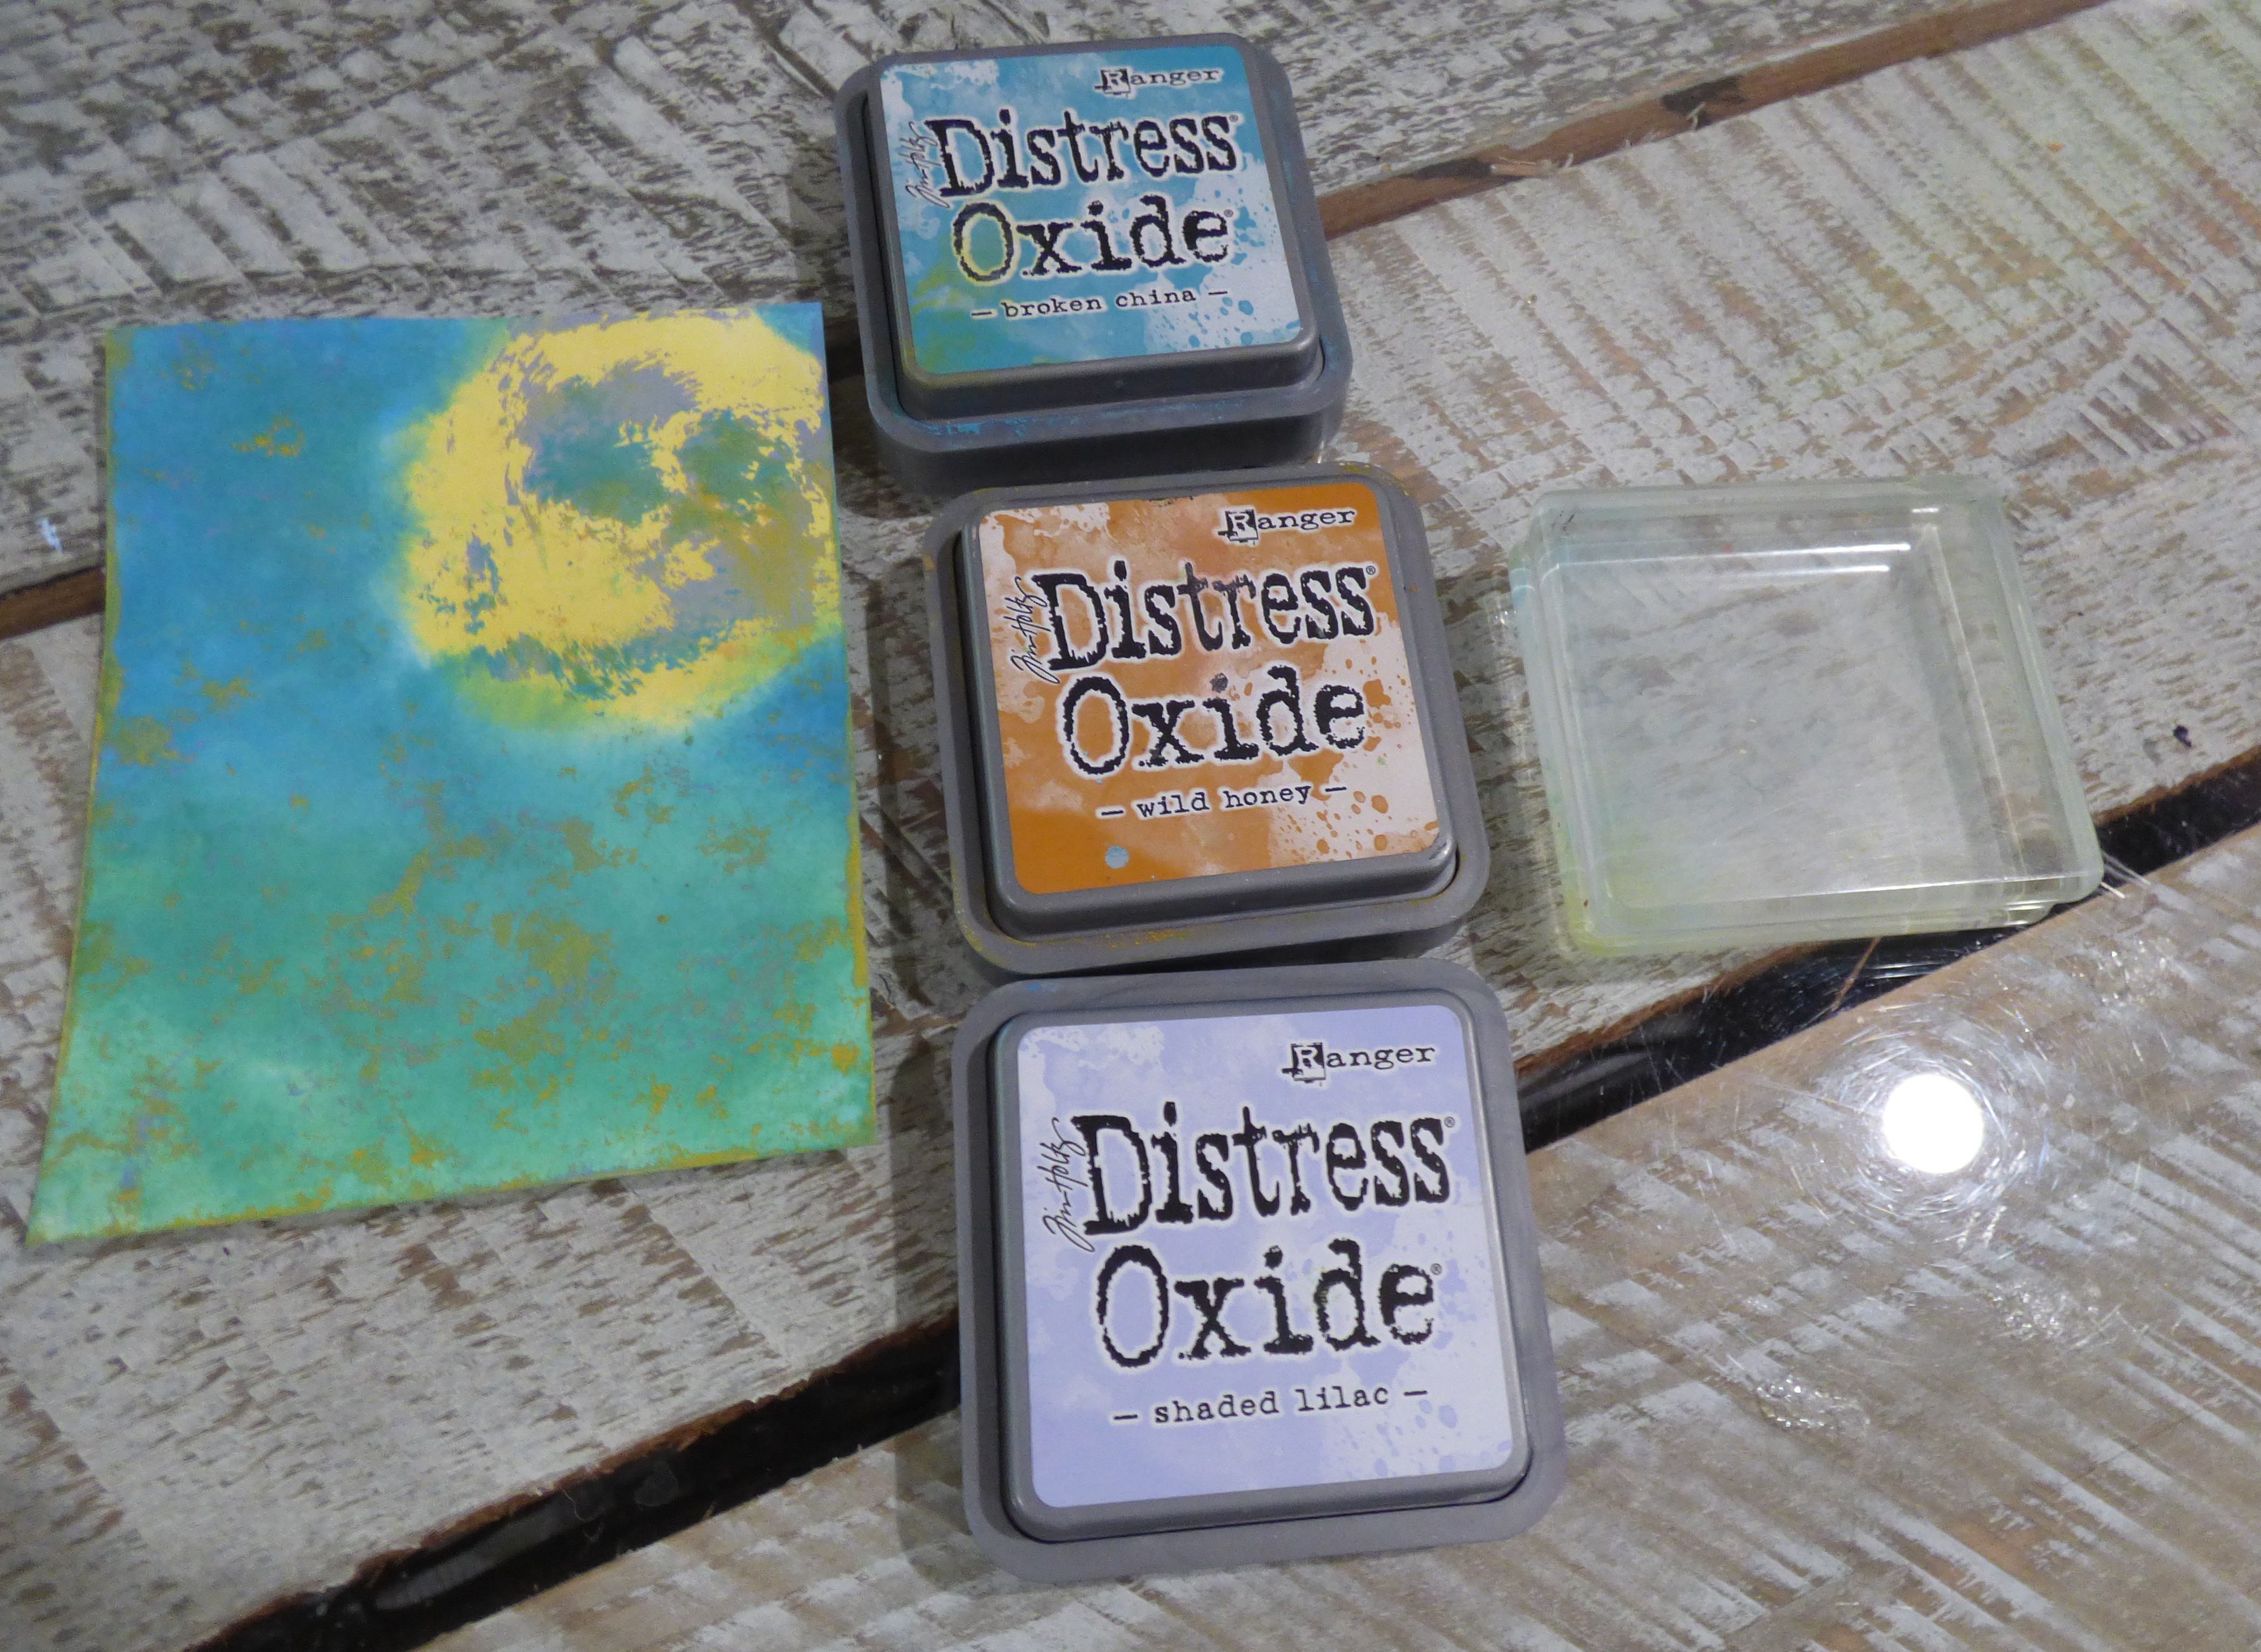
This is my first time playing around with Lavinia stamps and I love them! I've also been trying different techniques with the Distress Oxide inks.
Here are the steps for these Distress Oxide inks with a giant Moon background.


Then I dabbed on salty ocean, lucky clover, and added some peacock feather over those color in a few different spots.


Tuesday, April 28, 2020
Ranger Flower Oxide Inks
Playing with DISTRESS OXIDE inks

Since this COVID-19 pandemic, many of us have had more time at home. Since youtube contains a multitude of how-to videos, I decided to venture into the world of distress inks, distress oxide inks, and alcohol inks. I thought it was time to stretch my pallet a bit!
I experimented on both watercolor paper and smooth white paper. I found the watercolor paper gives the ink more play and movement and worked best with stencils. Particularly if you wanted to lay the stencil on top of the applied ink and rub off with a damp cloth. The smooth white worked nicely too, but not as much for using a stencil and wiping. I found if I got the smooth white too wet and applied pressure that it rubbed off a little of the paper.
The oxide inks on the above card were applied with the Ranger ink blending foam pads. Then spritzed with water. I stamped the flower from the Tim Holtz set "flower garden" in memento ink, over the oxide inks and added a little more color to the flower with alcohol ink markers. I stamped a background image over the top of the card by inking selected areas in a gray. Added a little texture paste over a dotted stencil, and removed a little ink with the same stencil and a wet paper towel. I used a small bottle cap and dipped in the texture paste mixed with gesso for the round circle.

I also applied the distress oxide inks to the background on this card with the Ranger ink blending foam pads. Then used an aspen tree background stencil to remove some of the ink with a damp paper towel. Stamped the flower in memento black, then added color with alcohol ink markers. Stamped the water drops and music notes. Used a small paint brush dipped in water to remove a little of the color on the water drops, and added white with a gel pen to the top of the water drops.

As you can see, I've had a lot of "social distancing". The results of the inks are never the same! Most of the above samples were the distress oxide inks. The hello you card with the rainbow of green yellow, orange and red was using just distress inks. I smooshed the inks on the ranger ink craft sheet, spritzed with water, and then applied my watercolor cardstock directly on top of the ink. I made 4 cards with the same ink on the craft mat and they all turned out slightly different.

This was one of my favorite cards. I used salty ocean, candied apple, and squeezed lemonade oxide inks. By applying the blue in one corner, the red in the other, and then yellow in the middle and blending outward, it created the rainbow effect. I spritzed a large floral background stamp with water and held the stamp on the image for a minute to remove some of the ink. Then stamped the image on top and color with alcohol markers and added white gel pen in for highlights. Stamped a script stamp in a few small areas.
Subscribe to:
Posts (Atom)