Wednesday, October 28, 2020


Masculine Moose birthday card. Using Evergreen Forest 3D EF and Pine Forest Dies. After embossing the whisper white cardstock, I sponged some varying colors of green atop the embossed tree images. I still love the Merry Moose Stamps and coordinating punch.
 

Wednesday, October 21, 2020


                            In the Pines and Pine Woods dies bundle. It's a monochromatic kind of day. Unfortunately I couldn't capture a photo showing the wink of Stella on the trees, adding a slight beautiful glimmer. The Winter Snow EF is so elegant looking. The sentiment and trees were stamped in Smoky Slate.

Tuesday, October 13, 2020

GATHER TOGETHER and COLORFUL SEASONS sets. Perfect for the fall season.  


I used the leaf, pumpkin and wheat images from the GATHER TOGETHER set. The pumpkin and leaf were stamped in Delightful Dijon and cut with matching GATHERED LEAVES dies. The wheat was stamped in Soft Suede. Also stamped the leaf image from COLORFUL SEASONS in versamark and used Gold Stampin' Up! emboss powder, then cut leaf in white from coodinating SEASONAL LAYERS  dies and adhered on top. The oval was cut using STITCHED SHAPES framelits. 


The thankful sentiment was die cut on foil paper using a die from RECOLLECTIONS sentiment dies. The netting image was from a retired SU set TIMELESS TEXTURES. 


Thursday, September 17, 2020

Bird Crazy and Gelli Plates

 More Gelli plate fun and the bird crazy stamps from Tim Holtz Stamper's Anonymous. I love, love, love these funny little birds. Their facial expressions are darling.


I used the Gelli plate, lightweight watercolor paper, acrylics, distress inks, stencils, brayer, sponges, distress paste and washi tape to create the backgrounds. I love the funky bold colors, great patterns and textures, and of course the crazy birds! The sentiments are from Tim Holtz Stamper's Anonymous Tiny Text set. 


SHINE LIKE THE STARS / light the way


BE YOUR BEAUTIFUL SELF / use your wings


DON'T FORGET TO FLY / choose to shine


the world needs who you were made to be / JUST ONE LIFE


Wednesday, August 12, 2020

Praying Gelli Plate Circles

Praying Gelli Plate Circles


I made three sympathy/praying for you cards last week. For all three cards I used the sentiment from SU set Flourishing Phrases. I love this sentiment because when one is going through a difficult time, or time of loss, it is so powerful to know that people are thinking of them and praying! For this one I used a gelli plate and stencil to create the background. I smooshed the distress oxide inks in picked raspberry, ripe persimmon, worn lipstick directly onto the gelli plate and then used a brayer to roll over them. I then placed the circle stencil on the gelli plate and sponged the hickory smoke distress oxide ink over the stencil, removed the stencil, and then pressed the paper down on the gelli plate. (I removed two images from the gelli plate, this may have been the second removal) For the flower from Stampers Anonymous Flower Garden, I diecut the flower, then used distress crayons to color the flower, and followed with stamping the image on top.


Sympathy Gelli Plate


Sympathy Gelli Plate 


I made three sympathy/praying for you cards last week. For all three cards I used the sentiment from SU set Flourishing Phrases. I love this sentiment because when one is going through a difficult time, or time of loss, it is so powerful to know that people are thinking of them and praying! For this one I used a gelli plate and stencil to create the background. I placed the stencil on the gelli plate and sponged the distress oxide ink over the stencil, removed the stencil, and then pressed the paper down on the gelli plate. For the flower from Stampers Anonymous Flower Garden, I diecut the flower, then used distress crayons to color the flower, and followed with stamping the image on top.


Praying Distress Oxides


I made three sympathy/praying for you cards last week. For all three cards I used the sentiment from SU set Flourishing Phrases. I love this sentiment because when one is going through a difficult time, or time of loss, it is so powerful to know that people are thinking of them and praying! For this one I used the distress oxide inks on watercolor paper, spritzing with water to bring out the effect. For the flower from Stampers Anonymous, I first used distress crayons to color the flower and then stamped the flower image on top.
 

Sunday, August 2, 2020

Rabbit jumps over the moon

Rabbit jumps over the moon


This is my first time playing around with Lavinia stamps and I love them! I've also been trying different techniques with the Distress Oxide inks. 

Here are the steps for these Distress Oxide inks with a giant Moon background. 


I began with watercolor paper and swishes a circle of the squeezed lemonade , laying it on pretty thick.


Then I dabbed on salty ocean, lucky clover, and added some peacock feather over those color in a few different spots.


I heat set the ink and then spritzed with water and heat set again. 


Next I squished the shaded lilac ink directly onto an acrylic block and smooshed that over the moon, and over scattered areas on the rest of the card as well.


I followed the same technique, smashing the broken china and wild honey in different places. Heat set again, and spritzed with water. 


I used a circle template and a gold jelly pen to draw a line outlining the moon.


The beauty of the distress inks is if you don't like it, you can always add more ink, or more water. 


Tuesday, April 28, 2020

Ranger Flower Oxide Inks


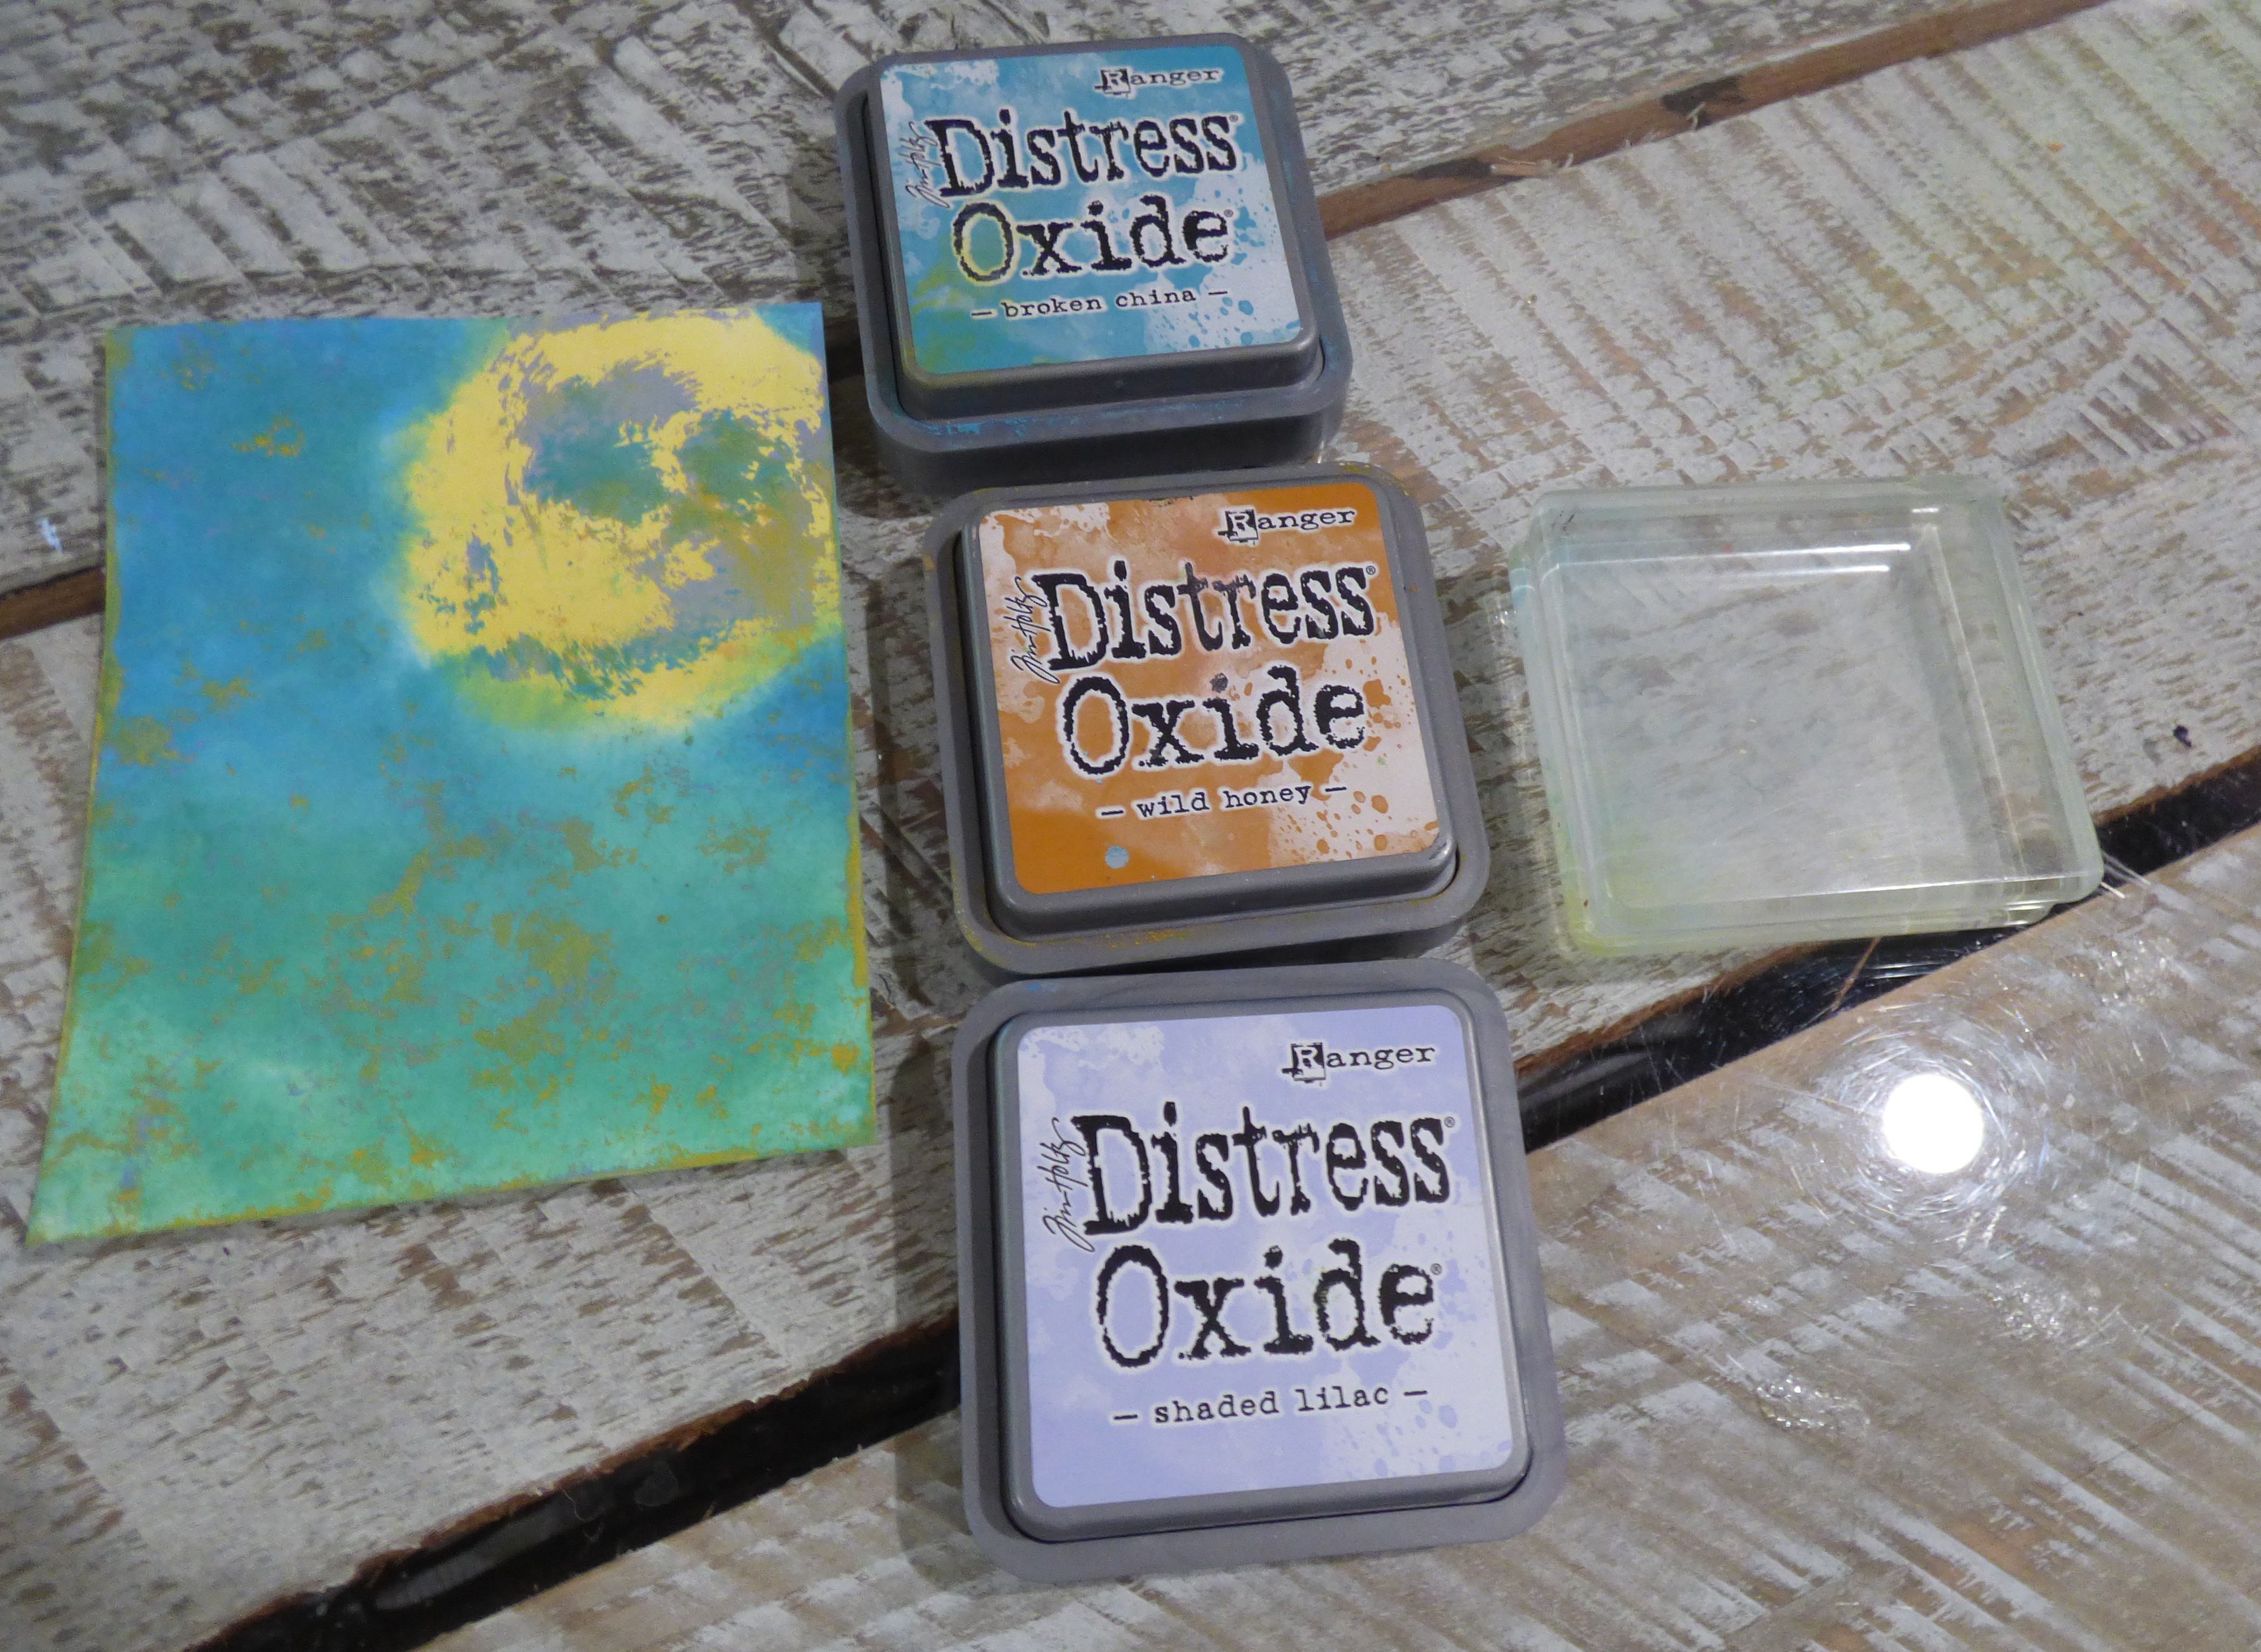
Playing with DISTRESS OXIDE inks


Since this COVID-19 pandemic, many of us have had more time at home. Since youtube contains a multitude of how-to videos, I decided to venture into the world of distress inks, distress oxide inks, and alcohol inks. I thought it was time to stretch my pallet a bit!

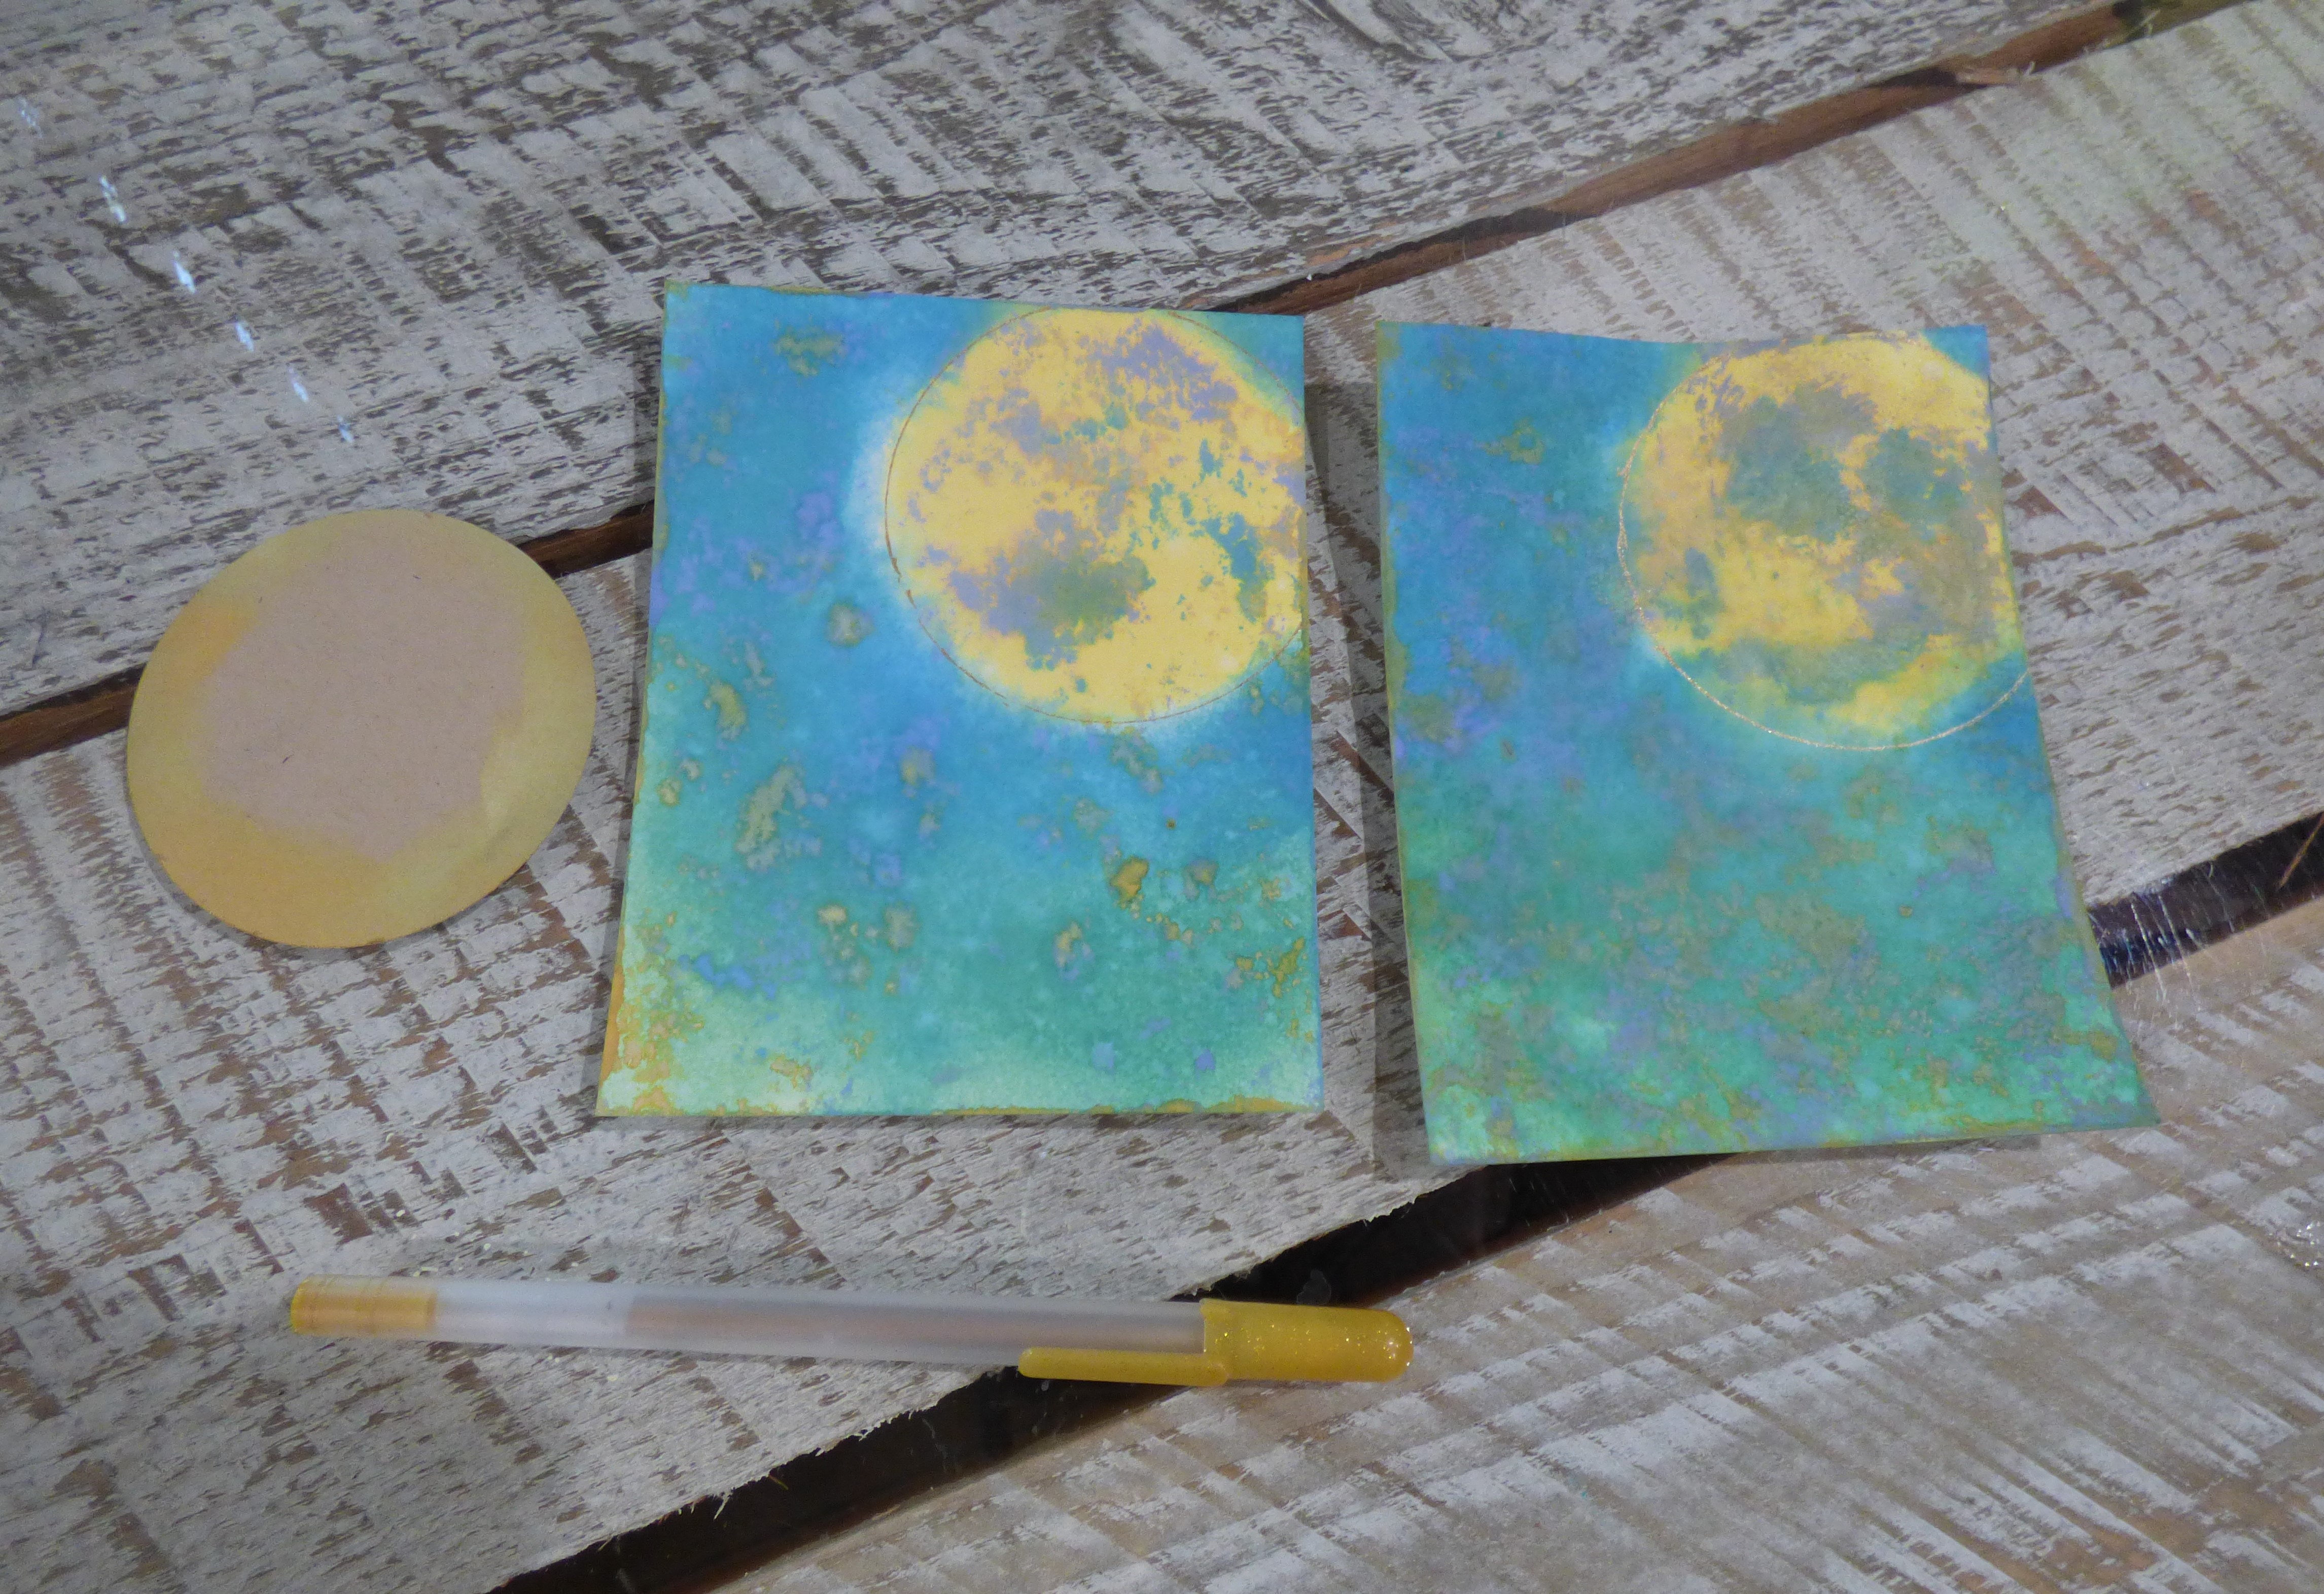
I experimented on both watercolor paper and smooth white paper. I found the watercolor paper gives the ink more play and movement and worked best with stencils. Particularly if you wanted to lay the stencil on top of the applied ink and rub off with a damp cloth. The smooth white worked nicely too, but not as much for using a stencil and wiping. I found if I got the smooth white too wet and applied pressure that it rubbed off a little of the paper.

The oxide inks on the above card were applied with the Ranger ink blending foam pads. Then spritzed with water. I stamped the flower from the Tim Holtz set "flower garden" in memento ink, over the oxide inks and added a little more color to the flower with alcohol ink markers. I stamped a background image over the top of the card by inking selected areas in a gray. Added a little texture paste over a dotted stencil, and removed a little ink with the same stencil and a wet paper towel. I used a small bottle cap and dipped in the texture paste mixed with gesso for the round circle.


I also applied the distress oxide inks to the background on this card with the Ranger ink blending foam pads. Then used an aspen tree background stencil to remove some of the ink with a damp paper towel. Stamped the flower in memento black, then added color with alcohol ink markers. Stamped the water drops and music notes. Used a small paint brush dipped in water to remove a little of the color on the water drops, and added white with a gel pen to the top of the water drops.


As you can see, I've had a lot of "social distancing". The results of the inks are never the same! Most of the above samples were the distress oxide inks. The hello you card with the rainbow of green yellow, orange and red was using just distress inks. I smooshed the inks on the ranger ink craft sheet, spritzed with water, and then applied my watercolor cardstock directly on top of the ink. I made 4 cards with the same ink on the craft mat and they all turned out slightly different.


This was one of my favorite cards. I used salty ocean, candied apple, and squeezed lemonade oxide inks. By applying the blue in one corner, the red in the other, and then yellow in the middle and blending outward, it created the rainbow effect. I spritzed a large floral background stamp with water and held the stamp on the image for a minute to remove some of the ink. Then stamped the image on top and color with alcohol markers and added white gel pen in for highlights. Stamped a script stamp in a few small areas.

Sunday, December 15, 2019


Well, it has been a few years since I have made a post. As life goes, sometimes the journey takes us in different directions. Now I have had a chance to play around with stamping and cardmaking again. This holiday season I have been playing around with Ranger Alcohol Ink techniques. This technique has made it's way into my Christmas cards.

For this card, I began with the Yupo paper as the paper medium for the alcohol inks. I like to spray the Yupo paper with the alcohol blending solution, and then apply very small dots of about 4 - 5  different colors of the alcohol ink. Then I apply a few more dots of the inks to the blending pad, spray again with the alcohol blending solution, and dab over the background repeatedly until I reach the desired effect. The beauty is that no two backgrounds are ever alike. For this card I used indigo, stonewashed, lettuce, sailboat blue and pitch black alcohol inks.

I incorporated the Peaceful Boughs, Perfectly Plaid, Pine Tree Punch, and Heirloom frames.

Saturday, December 17, 2016

Z Fold Snowflakes


I received a Christmas card from my friend Diane Doumitt in Florida that was a beautiful ZFold card. It inspired me to check out this simple technique! The ZFold itself is simple, but all of the miscellaneous details that go into each panel take some time when you do it as a batch of cards!


For the card base, take a 4 1/4" x 11" piece of cardstock - I used NIGHT OF NAVY. Score at 2 3/4" and 5 1/2". For the NIGHT OF NAVY pop out bottom strip, cut a 1 1/2" x 11" strip and score at 2 3/4" and 5 1/2".

The white panels for the main card are two in size 2 5/8" x 4 1/8", TOP NOTE bigZ die. For the pope out strip one size 1 1/4" x 5 1/8", and two size 2 5/8" x 1 1/4". For assembly, only adhere the left half of the long size of the strip to the left side of the background, and adhere only the right side of the scored strip to the side of the card with the TOP NOTE background.


I stamped WHISPER WHITE CS with BLUSHING BRIDE ink using the DIAGONAL STRIPE background stamp and then cut out with the oval from STITCHED SHAPES framelits. I stamped the tree from PEACEFUL PINES stamp set in SILVER metallic ENCORE ink and cut out with PERFECT PINES framelits. All background snowflakes were stamped in SMOKY SLATE using images from CHRISTMAS PINES, SNOWFLAKE SOIREE, AND FLURRY OF WISHES. Both sentiments are from the FLURRY OF WISHES stamp set and were stamped using Memento Tuxedo Black Ink.

The bow and pine branches were cut with PRETTY PINES thinlits using SILVER GLIMMER paper. The pinescones were cut out of BLUSHING BRIDE CS.

Only adhere the bottom part of the oval tree popout to the popout strip!

CHRISTMAS MOUSE


I love the MERRY MICE stamp set - so cute! The background is embossed with CABLE KNIT dynamed EF,and the stars are from the LUCKY STARS EF. The pines branches and bow are cut with the PRETTY PINES thinlits. The pines branch background and sentiment are from CHRISTMAS PINES stamp set. The background stripes were stamped using DIAGONAL STRIPE background stamp, and cut using TOP NOTE bigZ die. I used BLUSHING BRIDE, SMOKY SLATE and VERSAMARK INK embossed with black detail powder. Cardstock is WHISPER WHITE, SMOKY SLATE and BLUSHING BRIDE.


CAS Christmas Pines


A CAS card using CHRISTMAS PINES stamp set and PRETTY PINES framelits. I love the pop of color that the glitter paper adds! Pines were stamped in BROWN SUGAR, and branches were stamped in PEAR PIZZAZZ and ALWAYS ARTICHOKE. 

Sepia Tones


I thought it would be fun to try the train from the CHRISTMAS MAGIC set in Sepia Tones. The background tree is from WONDERLAND, and the sentiment is from CHRISTMAS PINES. THe train is stamped in BROWN SUGAR, and colored with BLUSHING BRIDE. 

Sunday, October 30, 2016

Welcome Baby Boy


SUPPLIES:

  • Cardstock: Whisper White, Bashful Blue
  • Ink: Basic Gray, Smoky Slate, Bashful Blue
  • Stamps: Made With Love, Something For Baby
  • Accessories: Lucky Stars and Square Lattice EF, Baby's First Framelits, 1" Circle Punch, Stampin' Write Markers. Nestabilities framelits, clothespin, and foil not SU.
Note: Glued aluminum foil to cardstock before diecutting the clothes hanger

Wednesday, August 10, 2016

Sending Smiles


SUPPLIES:
  • CARDSTOCK: Smoky Slate, Crisp Cantaloupe, Blusing Bride, Whisper White
  • INK: Crisp Cantaloupe, Smoky Slate, Rich Razzleberry
  • STAMPS: Picture Perfect, Flowering Flourishes, Greatest Greetings
  • ACCESSORIES: Bloomin' Heart Thinlits, Edgelit, Rhinestone Jewels, Paper Piercing template, Circle Die
NOTE: Stamped Bird under the diecut circle and then stamped on circle and lined up the wing.


Hedgehog Friends


SUPPLIES:
  • CARDSTOCK: Whisper White, Basic Black
  • INK: Strawberry Slush, Memento Tuxedo Black, Pear Pizzazz, Soft Suede
  • STAMPS: Love You Lots, Touches of Texture
  • ACCESSORIES: Scallop Trim Border punch, Large Oval & Scallop Oval Punches, Flourish Thinlit Dies, Vintage Button, Candy Dots, Aqua Painter. Twine not SU.


Card is size 5" x 7". Used the swish from touches of texture for the green below the hedgehogs.

Tuesday, March 8, 2016

I Heart You


SUPPLIES:

  • PAPER: Whisper White, Mint Macaron, Basic Gray
  • INK: Mint Macaroon, Smoky Slate
  • STAMPS: And Many More, Bloomin' Love
  • ACCESSORIES: Bloomin Heart Thinlits, Candy Dots, Soft Falling EF, Silver Cording
NOTES: Stamped heart from Bloomin' Love and then die cut with flower from Bloomin Hearts thinlits.

Friday, March 4, 2016

You're Sweet


SUPPLIES:

  • PAPER: Whisper White, Bashful Blue
  • INK: Night of Navy, Marina Mist
  • STAMPS: Bear Hugs, Bloomin' Love
  • ACCESSORIES: Bloomin' Heart Thinlits, Soft Falling EF, Basic Jewels Rhinestones
Love the clean and simple crispness of the soft blue and white! The flowers were stamped in Marina Mist as well as the banner. Sentiment was stamped in Night of Navy, then fussy cut banner.

Thursday, March 3, 2016

Sponged Deer


SUPPLIES:
  • PAPER: Mossy Meadow, Espresso, Baked Brown Sugar
  • STAMPS: In The Meadow, And Many More, 
  • INK: Tip Top Taupe, Whisper White, Pear Pizzazz, Daffodil Delight
  • ACCESSORIES: Sponge Daubers, Candy Dots, Stampin Write Markers, White Gel Pen, Word Window and 1" Circle punch, Square Lattice EF
First sponged bottom of Brown Sugar CS with Pear Pizzazz. Stamped deer and trees in Taupe, then grasses in Pear Pizzazz. Masked sun with 1" circle and sponged Taupe around sky and trees; sponged pear pizzazz around tree branches. Stamped flowers in Whisper White. Colored deer with Taupe maker and blender pen, then added gel pen highlights to flowers and deer. Added Espresso marker to deer eye and nose. Sponged sun with Daffodil Delight; distressed and then sponged edges of Brown Sugar cardstock with Taupe and Whisper White. Embossed Espresso with Square Lattice EF and distressed edges then sponged with Whisper White. Mounted on Mossy Meadow card.

Stamped sentiment in Whisper White on Espresso and then sponged edges with Whisper White. Added candy dots.