Wednesday, March 6, 2024

Quilt Card Template

Hello. I came across a posting for this fun quilt card and I thought I would share the process with you. It is such a great way to use up paper scraps! 

What you need: 

  • 8 1/2' x 5 1/2' for card base
  • 4" x 5 1/4" background panel piece (in my case I used gray)
  • (2) 1" x 5 1/2" strips of patterned paper
  • (11) 1" x 4" strips of patterned paper 
You could get away with less than the 11 pieces because you will only be using only a small corner or an inch or so on some of the pieces. 

Place your background panel down and begin by adhering the two longest diagonal pieces  - okay to let the edges overhang the panel. From there, use the template below to see placement of the remaining pieces. Just get the placement right with a small revealed border around each piece that you adhere. Don't worry about the overhanging edges - once all are attached, you will trim the edges down to the size of the background panel. Easy peasy!


This cute sentiment came from the Perennial Postage set item # 162598 in the mini catalog. To shop now: 
https://www.stampinup.com/?demoid=2264627


Friday, January 26, 2024

Perennial Postage


A card for a sweet friend using the PERENNIAL POSTAGE bundle. The stem is from the ARTISTIC dies. The background is the EXPOSED BRICK 3D ef and the PAINTED TEXTURE 3D ef. I used the blending brushes and applied Rich Razzleberry and Concord Grape to the die cut stem for an hombre effect. 
 

Saturday, January 6, 2024

Earn free stuff Sale-a-bration!

Now is the time to earn free stuff! The new mini catalog is available, and sale-a-bration has begun. From now until February 28, 2024 earn free products when you spend $50.00 or $100.00.  


Shop now: 

https://TracyHenry1.stampinup.net


Wednesday, October 25, 2023

Oh Night Divine

A manger scene Christmas card using the Night Divine Bundle. I used watercolor paper for the background effect. Spritzed with water, then used the blending brushes to add shades of blue.

Night Divine 

Added the stars with a stencil and embossing paste inked with crushed curry. The sentiment was heat embossed on vellum. I die cut all of the manger images in white and colored with blending brushes and ink. 


Monday, October 23, 2023

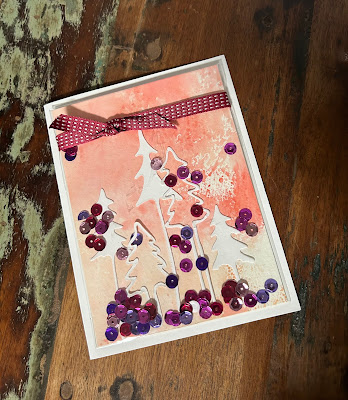
Easist Shaker Card Ever


 This is by far the easiest way to make a shaker card. I order these 4x6 cello bags on amazon. 


Then cut the insert pieces to 3 3/4 x 5. Stamp the insert or use designer paper, then insert in the clear bags and add sequins or glitter. 

When embossing on vellum you do not have to have craft ink or versamark ink. Any ink will work because it does not dry quickly on vellum, so just stamp and add powder and heat!


This is an old stampin up halloween set I found in my mom's stash. I buy the sequins at the dollar store.


Embellish with ribbons or sentiment! No need for the foam tape and way less hassle! For the Christmas shaker, I inserted the designer paper, then embossed the sentiment on vellum and slipped in on top. It was hard to get a good photo.